Easily secure your BreachBits account using your favorite authentication app, text, email or a phone call.
There is nothing hackers love more than easily-guessed, common or reused passwords. To keep your BreachBits account as secure as possible, we highly recommend enabling multi-factor authentication.
If you are creating a new account, multi-factor authentication is enabled by default, and you can start at step #2 below. Otherwise, start at step #1 to enable multi-factor authentication for your existing BreachBits account.
- Enable mfa. Select 'Services & Settings' in the left Navigation menu and find the 'Multi-Factor Authentication' selection under the 'Security and Privacy' section. Toggle the switch to enable mfa.

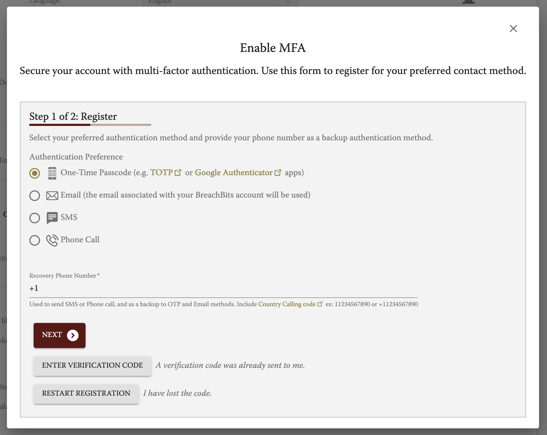
- Choose your mfa method. You will then be prompted to choose your preferred method of mfa and provide a recovery phone number. Your choices are:
- using your favorite authenticator app to receive a one-time passcode.
If you do not already use an authenticator app, you can download one for free. Popular options are Authy, Google Authenticator and TOTP. You can download these for your devices from the Apple App Store or Google Play. - receive a passcode via email. The email associated with your BreachBits account will be used.
- receive a passcode via text/SMS.
- receive a passcode from an automated phone call.
- using your favorite authenticator app to receive a one-time passcode.

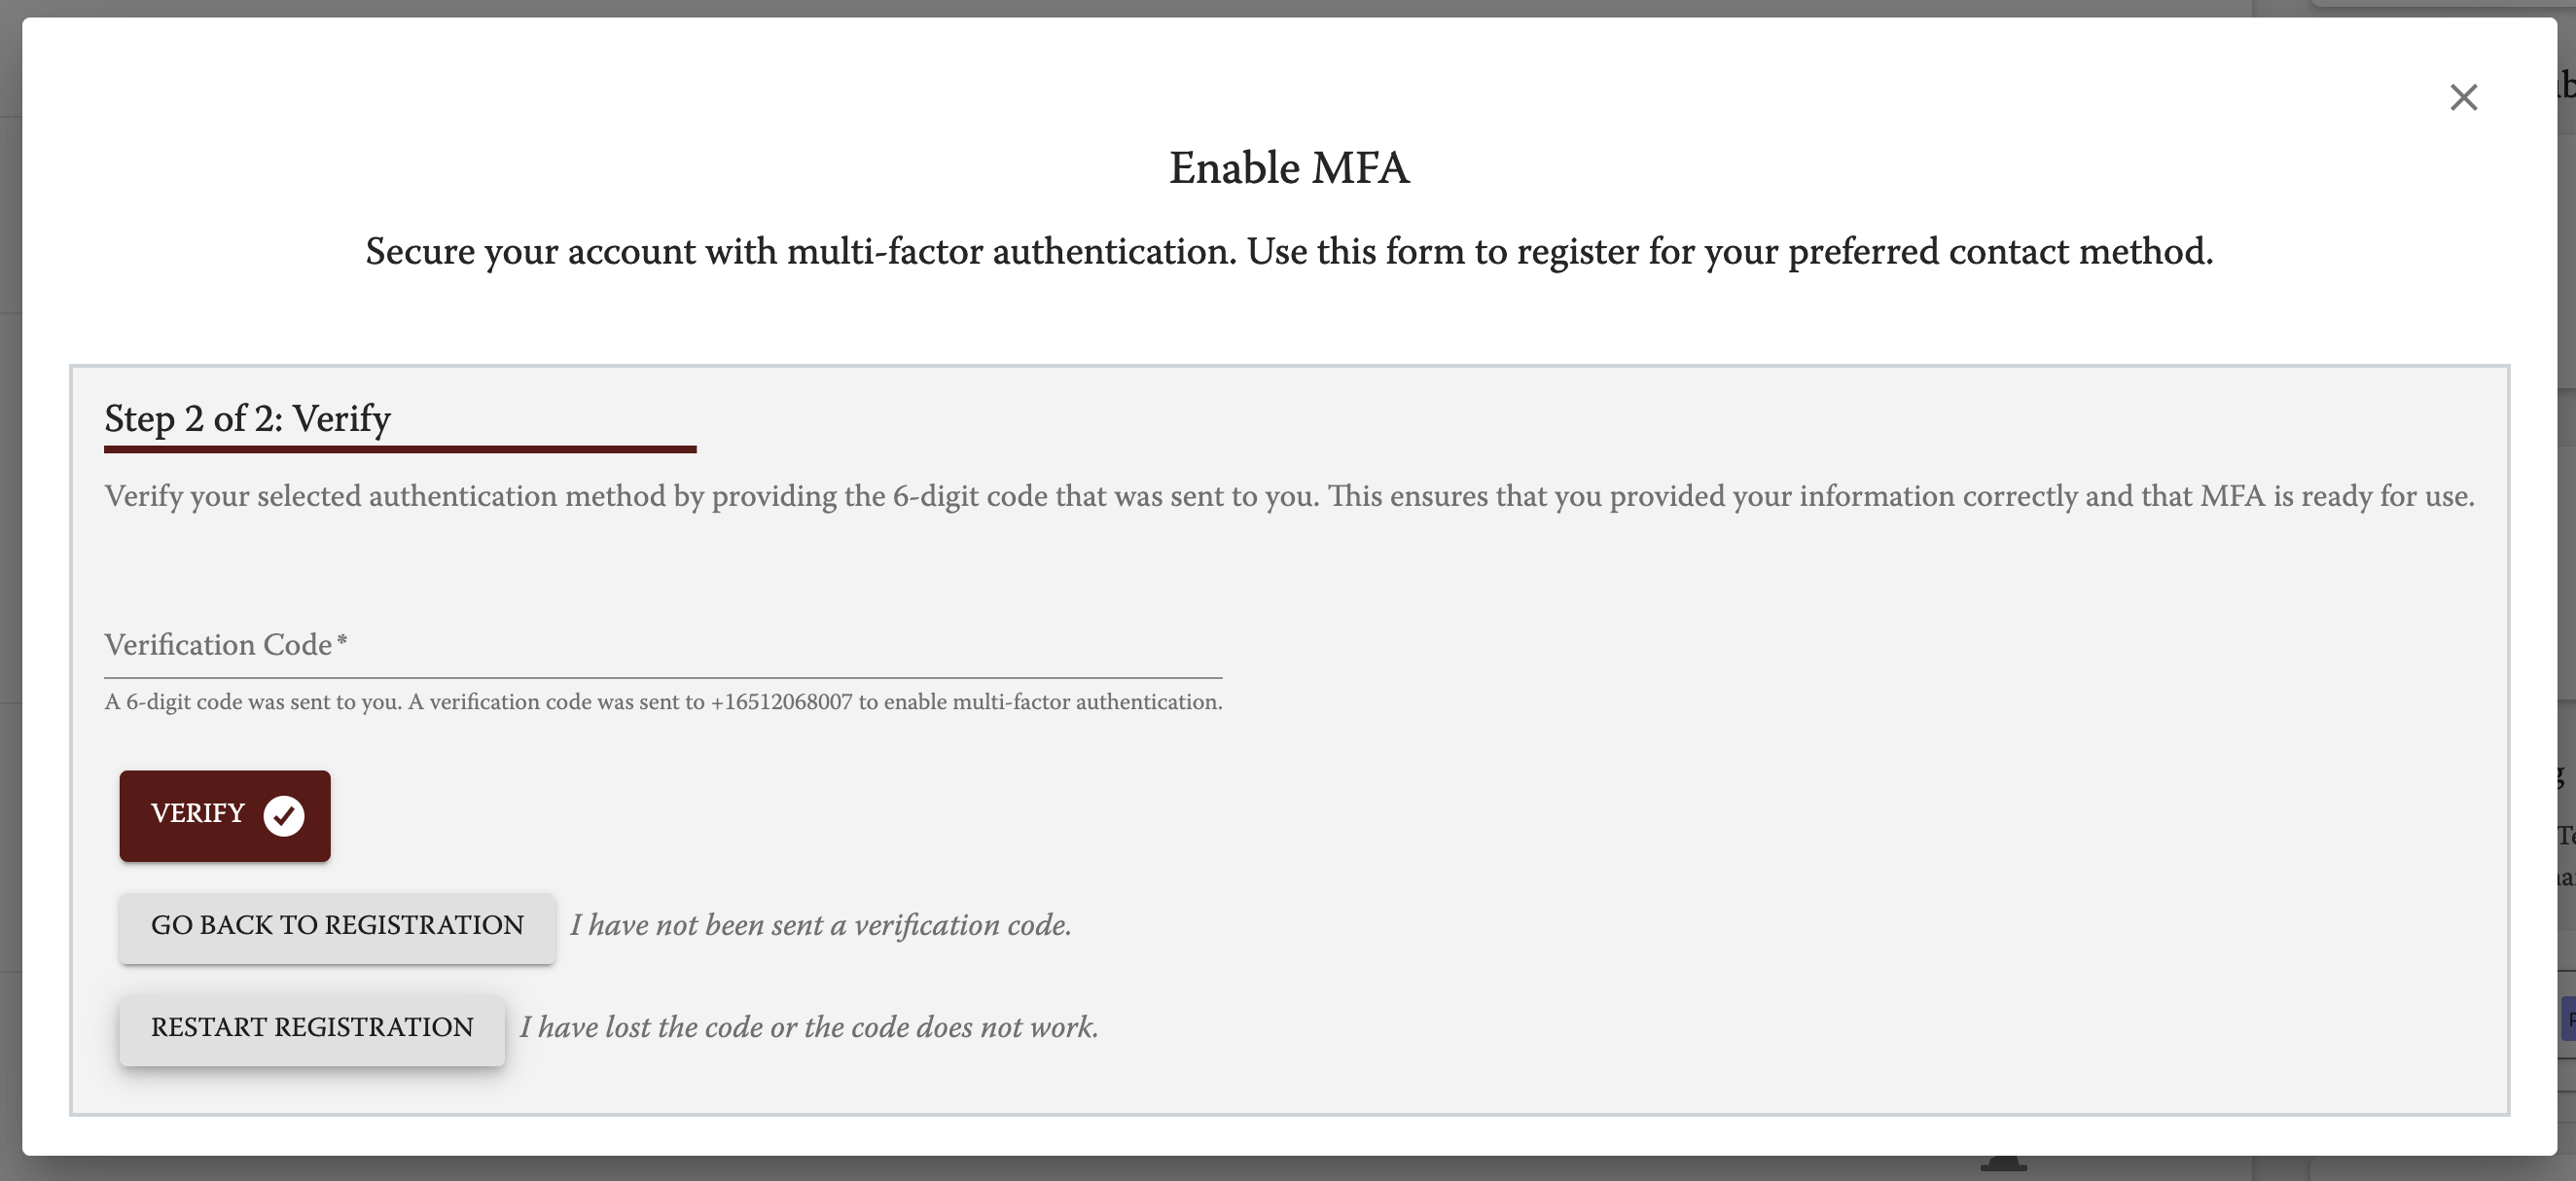
3. Verify your method. After you select your preferred method, enter your recovery phone number and select 'Next', you will be asked to verify your mfa method. This is to ensure you have access to the device and method chosen. Follow the steps below according the method you selected:
3a. Verify using your authenticator app. If you chose a one-time passcode generated by your authentication app as your mfa method, you will see a QR code to enroll your BreachBits account with your authenticator app. Once you scan the QR code with your authenticator app, enter the passcode on the line that says 'Verification Code'. 
3b. Verify using your email. If you chose email as your mfa method, the email account associated with your BreachBits account will be sent an email with a passcode. Enter the passcode from the email on the next window provided on the line that says 'Verification Code'.
3c. Verify using text/SMS. If you chose text/SMS as your mfa method, a passcode will be sent to the phone number you provided in the last step. Enter that code on the next window provided on the line that says 'Verification Code'.
3d. Verify with a phone call. If you chose phone call as your mfa method, you will receive a phone call at the number you provided in the last step. Enter the code you receive from that email on the next window provided on the line that says 'Verification Code'.

4. That's it! If the passcode was verified, your account is now protected with mfa. You should see the toggle for mfa enabled in the Services & Settings page. If at any time you would like to change your mfa method, simply use this toggle to disable mfa and repeat these steps with your new method of choice. 
